The best medicine is a good map : plan your travel from the lowest point to the highest. This is one of the things that should be easy , but isn´t always so. To continue the medicine analogy there is both some really good medicine out there … as well as some funky pharmacies. Good and bad sources and some online tools for altitude data :
* Wikipedia
This is where nine out of ten go for information. Generally good for capitals and the most well known cities , but one has to read carefully to see how many high high altitude destinations are spread out vertically. Case in point : a cursory reading of the La Paz article will quickly take away the notion that La Paz lies at 4000+ ( a notion that relies on the airport in El Alto – which is a separate town ) , but you have to read it carefully to see that the lowest parts actually are well below the altitude of Cusco ( 3400-ish ) . Outside capitals and major cities anything goes on Wikipedia : I have shifted for example the fairly well known location Sarchu ( “The Vomit Hilton” ) five hundred meters up from GPS and map readings .
* Falling Rain
Fairly unknown tool , with very accurate data on all airports. Case in point : it gives the right altitude for the Gongkar airport serving Lhasa , instead of the internet truth saying it´s two hundred meters higher.
The site also offers a huge listing of places around the world listed alphabetically , often with less sucess : one example is Kargil which has been misplaced five hundred meters vertically. The altitude is correct for the cordinates given , but this point is placed on a steep mountain slope outside the town.
The listings also require some basic geographic knowledge , starting with placing your search in the right region and state. This means for example being aware of which parts often attributed to Ladakh actually are within Lahaul ( i.e. Himachal Pradesh , not Kashmir ) , and looking for Tibetan destinations under the official Chinese name Xizang
* Google Earth
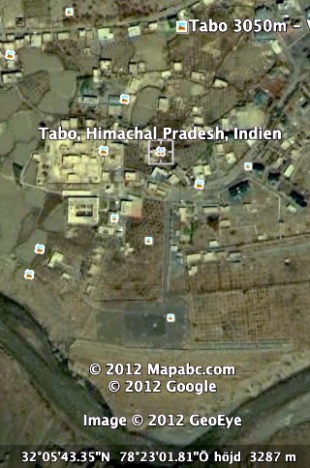
Software is good , while the wetware stuggles. One of many classic examples here from Tabo , Himachal Pradesh :
At the bottom of the picture we see the Spiti River , off center left is the Tabo monastery – zoom in close enough and you even get a good idea of the the layout of the buildings , and a sense of history on seeing the fuzzy worn down edges of chortens and chapels , compared to the newer surrounding buildings. Along the the top edge runs the road to Kaza , and a helpful linked image : “Tabo 3050 m “ This is where confusion enters : the view is looking down on Tabo from the meditation caves above . Is the altitude given from viewpoint at the caves , or from the monastery itself ? Googling this seemingly provides an easy answer : a massive amount of sources place Tabo at 3050 meters.
This is complicated by three factors : walking down from the viewpoint you are met by sign when crossing the road : Tabo , elevation 3265 meters. Fire up a GPS and it will show this to be the altitude of the river bend , and the gompa sitting twenty meters higher. Hauling around a GPS is hardly a requirement , and one may understand the part of missing the sign at the road .. but the last part is embarrassing , at the bottom of the window : Google Earth presents both position and altitude when you plonk down place marks and images on the map, and for every instant you rest the mouse cursor on the screen. In this case : 3287 meters.
The other snafu factor is the one already seen above from fallingrain : elevation data are correct for the placemark , but placemarks are erratically distributed . Some examples are surrealistic : the Boudnath stupa is a shock white dome , one of the largest stupas in the world in a – now – urban Kathmandu setting that for years had a placemark more than a kilometer off . You´ll find the same village along trekking trails duplicated more than a days walk from each other , after being guesstimate positioned afterwards at the home computer.
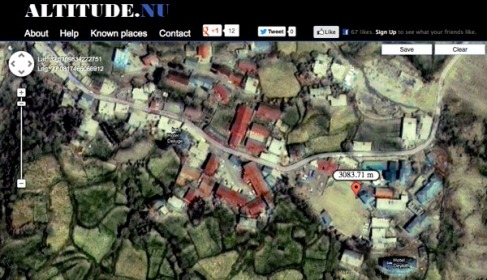
* altitude.nu is an online resource , that uses the same satellite data as Google Earth. The advantage over other online tools ( like Wikimapia ) is that you get an altitude with each placemark. Saving positions gives a link – same as on Wikimapia. The flipside is that you have to know where to place positions : there is no search function. One example here : Keylong bus stand , which is below 3100 ( along with the rest of the town ), contrary to web lore.
* Altimeters are based on air pressure , and for this reason have a bad reputation , from the expectation that weather variation will mean random values. Well maintained altimeters actually seem to work ok – one example can be seen on Janne Corax´s bicyle logs over the Himalayas , where there is little variation ( as a rule within fifty meters ) between altimeter and GPS .
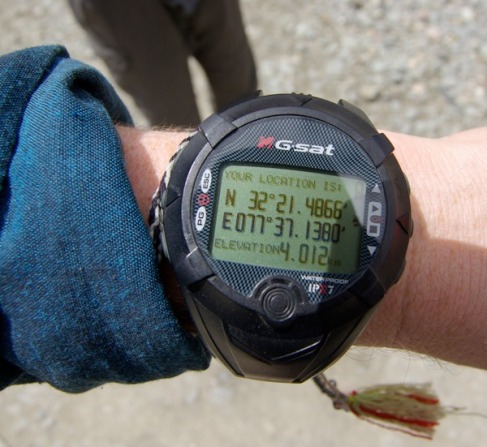
* GPS is rightfully the practical golden standard. Precision depends on the number of satellites with a clear line of sight to the GPS unit , giving highest precision on mountain peaks , wide plateaus and passes . In practical terms precision is within a few meters ( even with instruments that can appears as toys , as long as one is outside the urban canyon landscape , the likes of the trail to Petra , or road sections that are gallery cut in to the side of mountain.
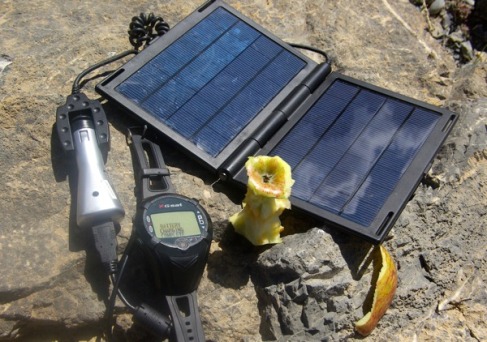
The backside is that GPS eats a lot of batteries. Keeping them powered up for days is not an option , unless you can recharge along the way.
Afterword : does this really matter ?
Well , in some cases it means a vital difference.The Sarchu entry on Wikipedia definitely had safety consequences.On a less dramatic scale : altitude sickness is nearly impossible below 2500 meters , as long as there is no exertion involved. A thousand meters higher it starts to become relatively common – without exertion. The offshot of that , and the fact that acclimatization is dead slow to non-existent under two thousand meters , means that a lot can be won by planning the first nights right , with the right information. Especially on a tight schedule it can be worth a lot to place your first acclimatization nights well over two thousand meters , and below three thousand.


